Ducati Monster Forum

powered by:

January 20, 2025, 04:54:24 AM *
Welcome, Guest. Please login or register.

Login with username, password and session length
News: Please Help
 
   Home   Help Search Login Register  


Pages: 1 [2]   Go Down
  Print  
Author Topic: Lowering the headlight,clocks and nose fairing  (Read 42793 times)
DucHead
Hero Member
*****
Offline Offline

Posts: 3295


No garage queens


« Reply #15 on: January 08, 2009, 11:05:19 AM »

So, here's what I came up with for lowering the gauges/headlight with the Cycle Cat triple.

I used three different OEM fasteners: (1) the two special screws (Allen fasteners that secure the gauges), (2) the two metal fasteners with M5 threaded rod protruding from each side, and (3) the two hexagonal fasteners with a pin on one end (that fits into the plastic inserts that are pressed into the U-tube) and an M5 threaded hole on the other.

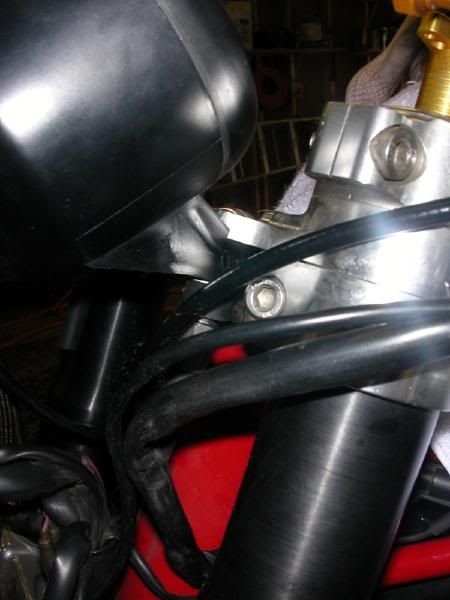
First, I used a utility knife to carve a little material from the area where the gauges rest against the bottom of the triple.  This allows the gauges to sit flush against the bottom of the triple.  In these two pictures, you can see where I cut material away.
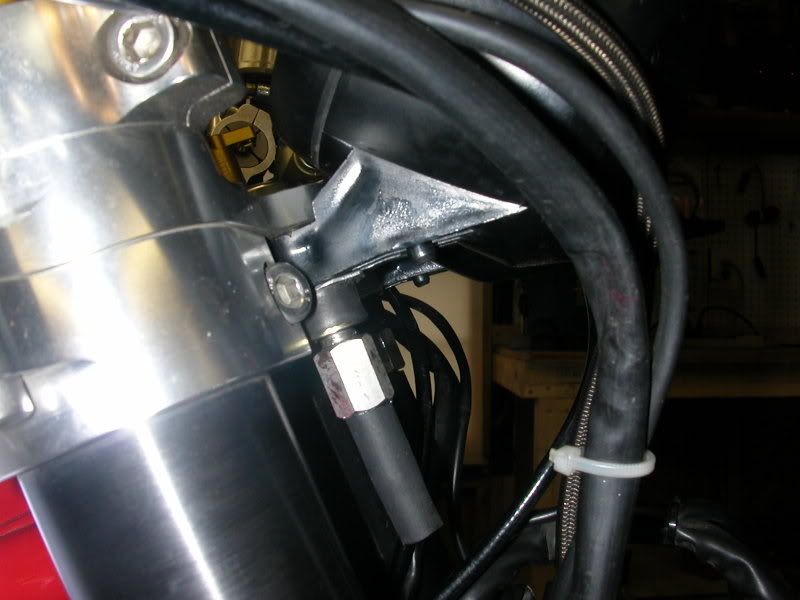


Instead of the OEM plastic plugs that insert into the U-tubes, I used some stiff rubber tubing, shown on the pins above.  This allows the whole thing to be disassembled easily, provides damping, and is nevertheless sturdy when assembled.

Here is the U-tube after welding and powdercoating:
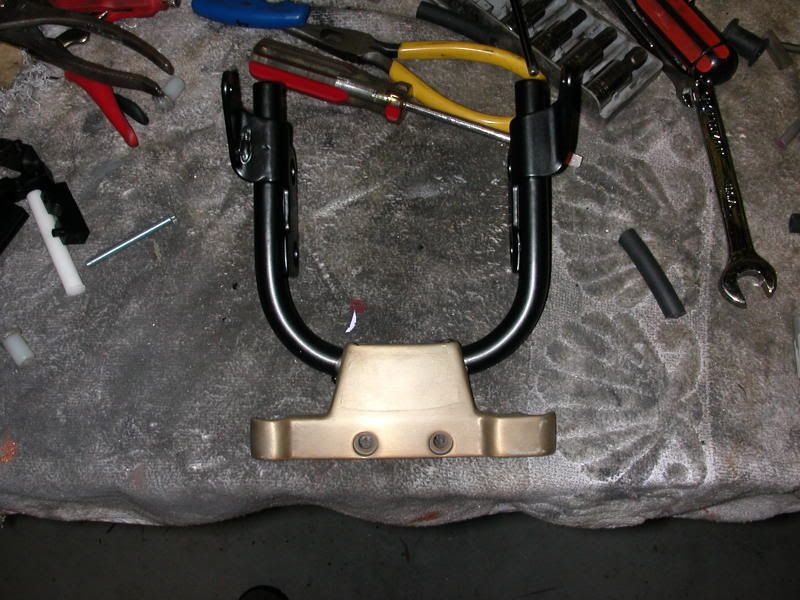

Then I drilled 3/8" holes for M6 rivnuts (rivnuts will obviate nuts for securing the screen):
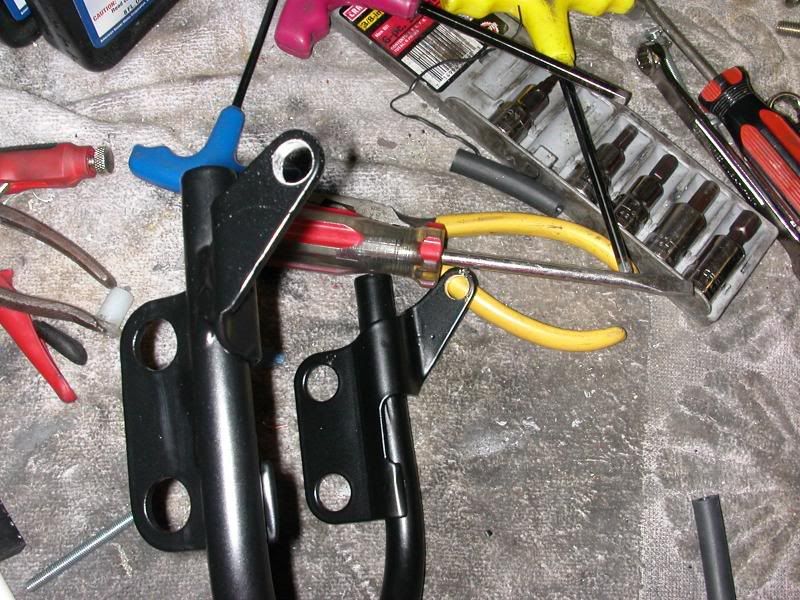

Rivnuts inserted:
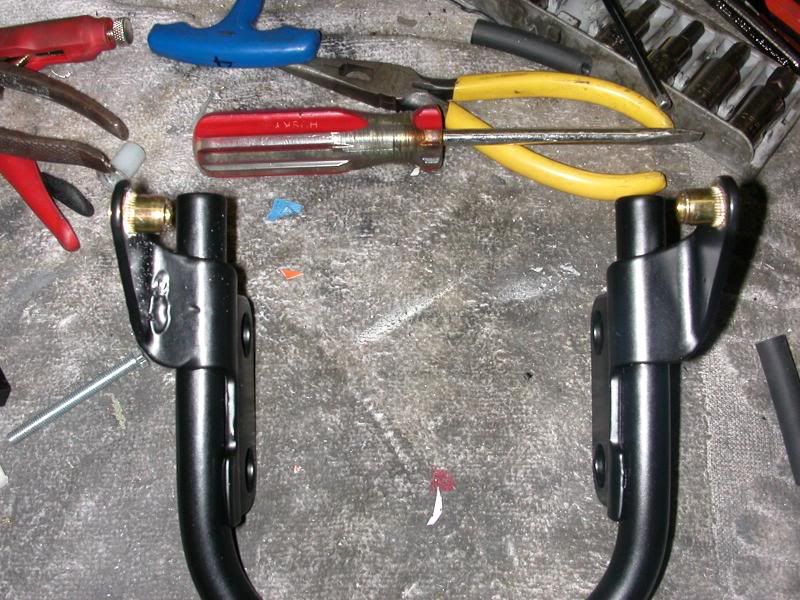

Now some polishing:
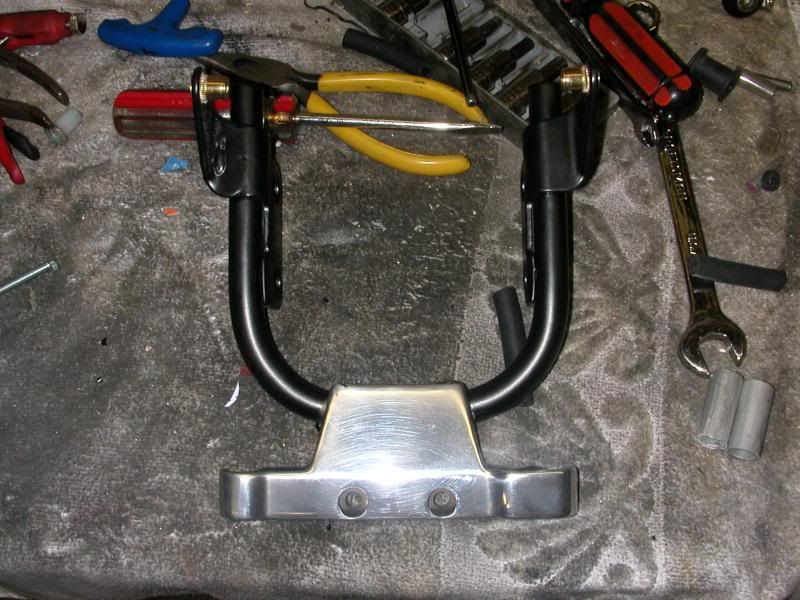

With the pieces of rubber tubing inserted into the U-tube, I put a little grease on pins which are attached to the fasteners holding the guages onto the triple, and pushed upward to secure the U-tube:
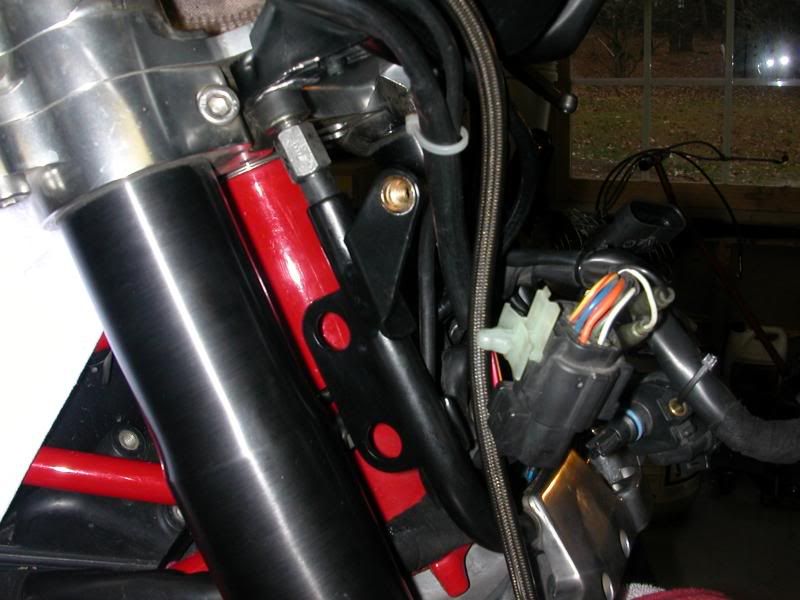

The rubber fittings allow the U-tube to be removed easily.  First, remove the two bolts from the lower triple clamp, and then pull the U-tube outward and downward.

Here you can see how an Allen bolt (and wavy washer) is used to secure the windscreen to the brackets on the U-tube.  No more difficult-to-reach nuts on the inside of the bracket.
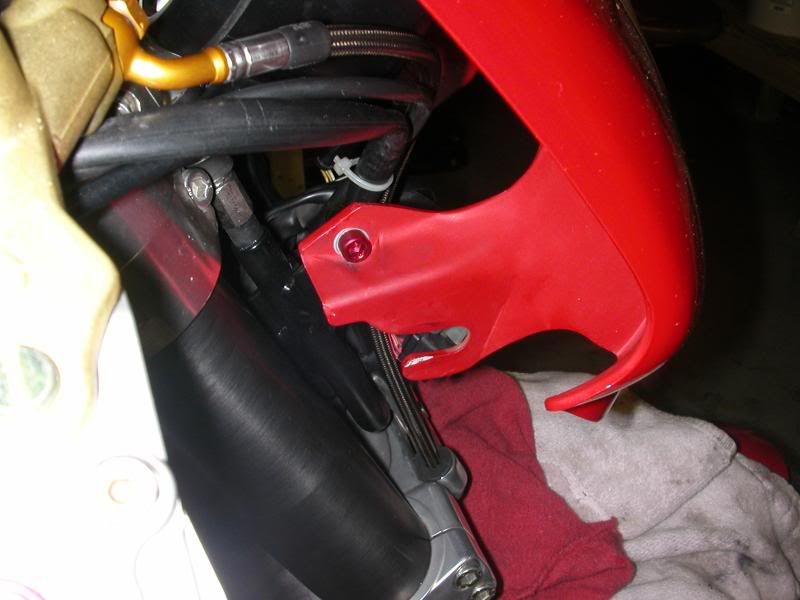

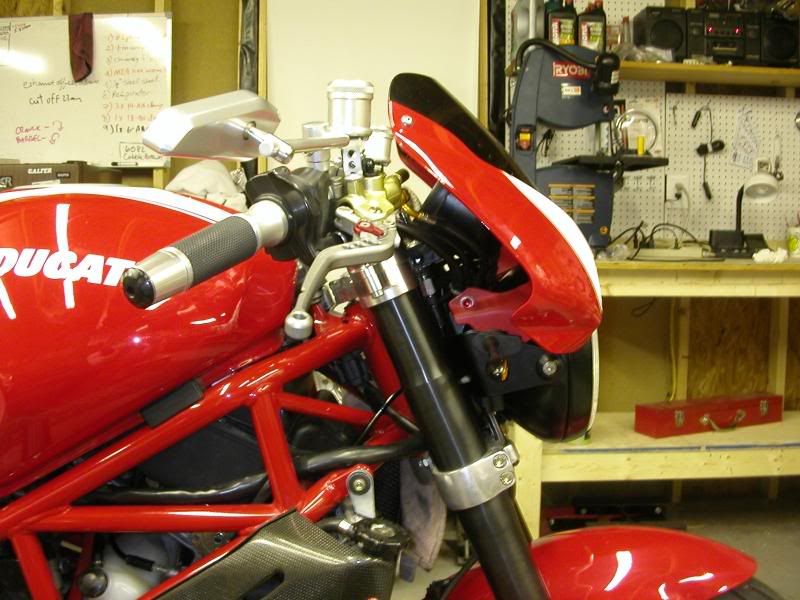
Here's a shot from the side with everything bolted up:

And a shot of the cockpit:
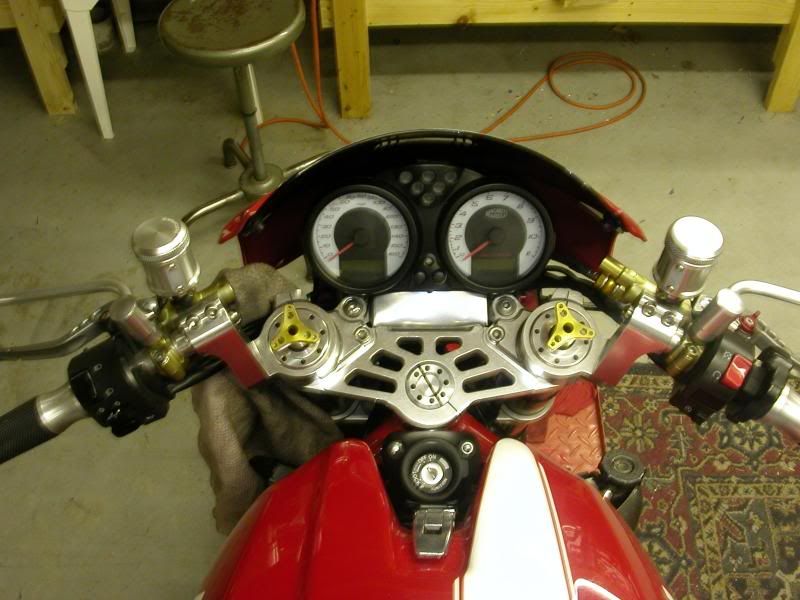

If nothing else, this mod cleans up the area around the top triple.  I also added (temporarily) an Al "dash" to hide the wires behind the headlight.

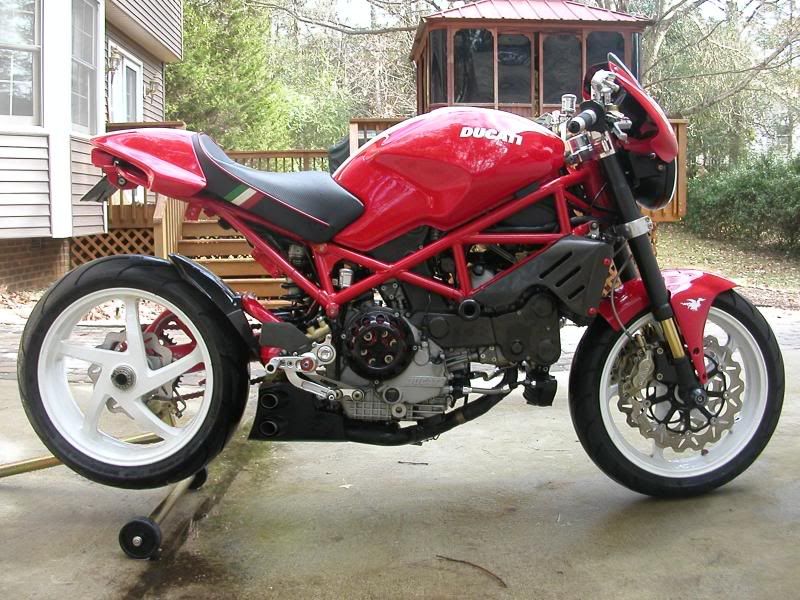
Side shot, before lowering:
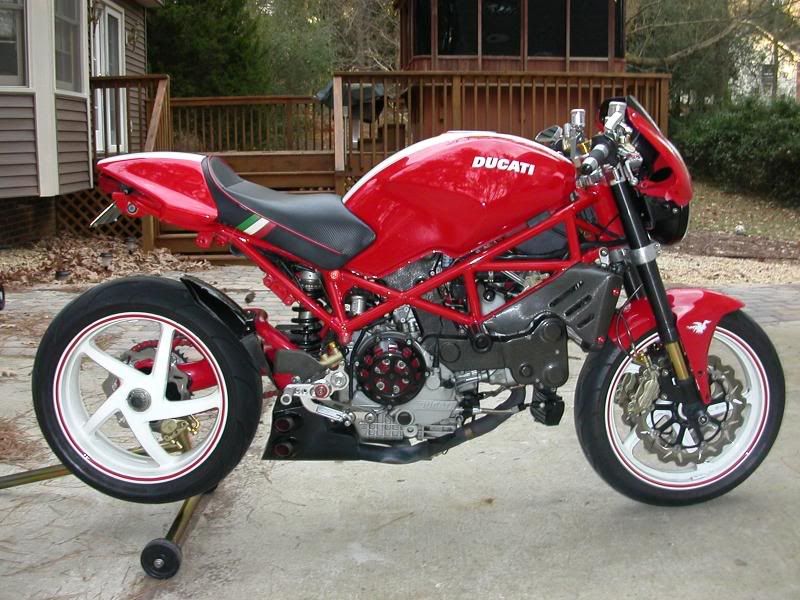
Side shot, after lowering:
« Last Edit: January 10, 2009, 02:30:52 PM by pompetta » Logged

'05 S4R (>47k mi); '04 Bandit 1200 (>92k mi; sold); '02 Bandit 1200 (>11k mi); '97 Bandit 1200 (2k mi); '13 FJR1300 (1k mi); IBA #28454 "45"
duccarlos
Local Moderator
Hero Member
*****
Offline Offline

Posts: 7994


WWW
« Reply #16 on: January 08, 2009, 12:55:35 PM »

I lowered my gauge, but replaced my headlight, so I had no need for the mounting brackets.
Logged

my keyboard just served me with paternity suit.
slowkitty
Full Member
***
Offline Offline

Posts: 136


« Reply #17 on: January 16, 2010, 08:50:17 PM »

From page one ....


Where can I get these? Home Depot?

Cheers


Logged
Scooter Montgomery
Hero Member
*****
Offline Offline

Posts: 615


Milford, NH


« Reply #18 on: January 19, 2010, 05:58:50 AM »

From page one ....


Where can I get these? Home Depot?

Cheers


I got them at Lowes.


Logged

2003 620 Half Dark/ Half Silver 35,000 happy miles
DucLeone
Sr. Member
****
Offline Offline

Posts: 305


« Reply #19 on: July 22, 2010, 11:39:26 AM »

got mine done today  Cool
Logged

DUCATI NON E UNA MOTO, E UN STILE DI VIVERE
KISS FRENCH AND RIDE ITALIAN
S2R 800 Black
Two dogs
S2R1000 gives me a warm feeling in my
Hero Member
*****
Offline Offline

Posts: 1779


« Reply #20 on: August 04, 2010, 06:35:20 PM »

+1 more

 
As the fly screen replaces the headlight bucket bracket as a support
all I had to do was make a small lowering tab out of some scrap alloy.
I may lower the clocks at a later stage if I can find a cheap second hand U frame to do a complete job.
Logged
mookieo2
Hero Member
*****
Offline Offline

Posts: 723


« Reply #21 on: August 06, 2010, 01:43:30 AM »

From page one ....


Where can I get these? Home Depot?

Cheers


I actually put the bolt in from the bottom. I think it was 250mm long bolt. I used two nuts below the gauges to adjust the length of the bolt that stick out from the top of the triple and put an acorn nut on top. I think it looks much cleaner than the screw cap.

Logged
DarkStaR
Hero Member
*****
Offline Offline

Posts: 1959


« Reply #22 on: August 06, 2010, 09:00:46 AM »

I actually put the bolt in from the bottom. I think it was 250mm long bolt. I used two nuts below the gauges to adjust the length of the bolt that stick out from the top of the triple and put an acorn nut on top. I think it looks much cleaner than the screw cap.

OR

Bolt from bottom, and get (or cut) shorter bolts.

Logged

Two dogs
S2R1000 gives me a warm feeling in my
Hero Member
*****
Offline Offline

Posts: 1779


« Reply #23 on: September 26, 2010, 10:01:19 PM »

Finished lowering the clocks

http://ducatimonsterforum.org/index.php?topic=42960.0
Logged
newbie_mike
New Member
*
Offline Offline

Posts: 24


« Reply #24 on: July 27, 2011, 03:37:38 PM »

+1 more

 
As the fly screen replaces the headlight bucket bracket as a support
all I had to do was make a small lowering tab out of some scrap alloy.
I may lower the clocks at a later stage if I can find a cheap second hand U frame to do a complete job.

Sorry to thread-jack....
What fly screen is that?
Logged

s2r 800 dark  05
Two dogs
S2R1000 gives me a warm feeling in my
Hero Member
*****
Offline Offline

Posts: 1779


« Reply #25 on: July 28, 2011, 08:17:41 PM »

This one

http://www.monsterparts.com/pc/004DM/Bodywork-Carbon/004DM.html
Says not available but Jeff should be still able to source it from Germany
  Grin
« Last Edit: February 02, 2012, 01:10:01 PM by Two dogs » Logged
duke8
Full Member
***
Offline Offline

Posts: 135


« Reply #26 on: August 20, 2012, 02:34:05 AM »

Just thought I'd add something to this as I haven't seen anyone else do it...

For those who don't have welding skills or a welder to do the job, I cut my brackets and riveted  them back on rather than having them welded. Used 3 rivets each side, one in the side, the front and the bottom... It's very solid and looks pretty neat, and requires no special skills or tools other than a drill, a rivet gun and some rivets...
Logged

'06 S4RS
'05 Monster 620
Pages: 1 [2]   Go Up
  Print  
 
Jump to:  


Powered by MySQL Powered by PHP Powered by SMF 1.1.21 | SMF © 2015, Simple Machines
Simple Audio Video Embedder
Valid XHTML 1.0! Valid CSS!
SimplePortal 2.1.1