|
BretMorris
|
 |
« on: May 23, 2008, 03:56:36 AM » |
|
Well my new Pazzo levers arrived today. MMMM... do I install them myself of get the shop to do it when they are doing something else on the bike? I am okay with a set of spanners but certainly not a mechanic. So my questions to the wider and more mechanically astute of you are:
Do you really need special tools ie the veneer calipers as per the youtube video for the clutch?
Is it an installation that most people who can effectively use a screwdriver handle?
Are there any pitfalls for young players?
and has anyone got a copy of the detailed instructions that I should be able to get off the pazzoracing website.. but cant?
Cheers
Bret
|
|
|
|
|
 Logged
|
|
|
|
|
Big T
|
|
« Reply #1 on: May 23, 2008, 04:22:41 AM » |
|
I'm also no mechanic but did mine in about 20 minutes per side. The hardest thing was getting the rubber boots back on and lining up the piston rods. Greased up the rubber boots which helped heaps. Be careful of the micro switches on the clutch and brake......... A second pair of hands helps (GF, wifey, mate, etc.)....  |
|
|
|
|
Logged
|
 .... This is your captain speaking. Please fasten your seat-belts as we prepare for take off.... (I'm the passenger now....) |
|
|
|
MonsterDorf
|
|
« Reply #2 on: May 23, 2008, 05:06:30 AM » |
|
Mate changing the levers is simple as.
Take out the bolt, remove the old lever, put the new one in its place put the bolt back in.......now simply adjust the "plunger" so it has some free play. The key is that you need the master cylinders to be in there resting position when not in use. Also you can back off the plunger/rod a little if you want more free play in your clutch/brake. Remember though depending on where you adjust the lever to (setting 1 - 6) you still need to get full throw of the clutch and enough pressure on the brake.
A bit like the Johnny Walker ad of yesteryear - Hard to pronounce easy to drink!
Cheers
|
|
|
|
|
Logged
|
|
|
|
|
BretMorris
|
|
« Reply #3 on: May 23, 2008, 05:39:02 AM » |
|
Thanks guys, might have a look at it in the morning. Looks like they suggest starting with the brake lever first as it is the least complicated.... i think that means easier!! I noticed on what I hope to be the clutch lever a rod that isnt on the brake one....mmm.... looks like tomorrow morning might be interesting..... patience..
If I stuff it up the Monster is due into the shop for the new Termis on Friday.. maybe I should wait...lol
Anyway thanks
Bret
|
|
|
|
|
Logged
|
|
|
|
|
BretMorris
|
|
« Reply #4 on: May 23, 2008, 11:54:03 PM » |
|
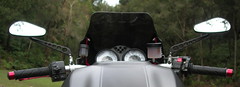
Well my patience got the better of me and I decided to have a go at the brake lever...mmm.... I think I got it right..... havent tested it yet. But I have taken a few photos and posted them on my photobucket site. Would greatly appreciate it if the guys out there who actually know what they are doing ( unlike me ) could have a quick look at the photos and see if it looks ok!!! LOL.. Silly request I know.... but... The rubber boot looks a little squashed.. but seems to work ok....   So what you reckon? I am not sure about tackling the clutch one.. lol Bret |
|
|
|
|
Logged
|
|
|
|
|
mattyvas
|
|
« Reply #5 on: May 24, 2008, 01:07:58 AM » |
|
Looks the goods Brett, of course you'll know when you grab the front next time.
but looks like it's in pretty neat.
|
|
|
|
|
Logged
|
|
|
|
|
MonsterDorf
|
|
« Reply #6 on: May 24, 2008, 01:28:45 AM » |
|
Did you back off the adjustment screw (plunger/rod)?
You have to make sure the piston in the master cylinder is fully seated as the hole that the fluid flows down is right at the end and you can't get it flowing out of the reservoir into the pressure side otherwise.
So make sure you back of the screw, until you have a small gap then just screw it in slowly until it just touches - easy to do, trust me.
Clutch is just as easy.
|
|
|
|
|
Logged
|
|
|
|
|
BretMorris
|
|
« Reply #7 on: May 24, 2008, 01:35:24 AM » |
|
Oh... didnt do any of that... brake works thou.. grrr..
So what would you recommend... remove and do it again?
Bret
|
|
|
|
|
Logged
|
|
|
|
|
R_usty
|
|
« Reply #8 on: May 24, 2008, 02:17:29 AM » |
|
Oh... didnt do any of that... brake works thou.. grrr..
So what would you recommend... remove and do it again?
Bret
Bret, It really is straight forward. If you have put it all on and when you squeeze the brake the calipers grip the disks then you are good to go. With the rubber boot just make sure you are in the middle and it is not pinching anywhere. The other side is the similar but you will need a very small allan key as there is a small allen nut that you use to tighten up the unit. When you go to undo it you will understand. If you don't have access to very small allan keys then make sue you can get to your local auto shop as you may need to buy one as this grub screw is important. Otherwise it is the same on both sides and the Pazzos are great Have fun R_usty |
|
|
|
|
Logged
|
---------------------------------------------------------------------------------------
Monster S4RS - Sold....... Looking for a new ride!
|
|
|
|
BretMorris
|
|
« Reply #9 on: May 24, 2008, 05:42:43 AM » |
|
Well I havent taken the bike for a ride... only backed it out of the shed and rode it back in... seems to work... The wife has taken the keys off me... not allowed to ride at the moment as i am under medications...grrrrr... Got to hate "cluster headaches"...
So if tomorrow my brain is working I might tackle the clutch. I have watched the Pazzo instuctional youtube thing.... seems ok...mm..
The only issue the clutch lever has this additional piece on it!!! About 1 inch rod... what is that for??
Bret
|
|
|
|
|
Logged
|
|
|
|
|
BretMorris
|
|
« Reply #10 on: May 25, 2008, 12:45:56 AM » |
|
Well I couldn't help myself and so had a go at the clutch lever this afternoon. All seemed to work a treat...apart from getting the boot and plunger to co-operate. All back together but I think I need to have the plunger / actuation thingy adjusted .... The clutch operates but think it just need to plunger screwed out a bit.. to take some of the play out of the clutch... not sure.. Can that be done with out disassembly? Anyway, if not it is still rideable and it does into the shop for the Termis hopefully this week. They can look at it then..
Thanks for all your advice.
Bret
|
|
|
|
« Last Edit: May 25, 2008, 08:53:30 PM by BretMorris »
|
Logged
|
|
|
|
|
techno
|
|
« Reply #11 on: May 26, 2008, 04:35:30 PM » |
|
The only issue the clutch lever has this additional piece on it!!! About 1 inch rod... what is that for??
I have CRG's on my S2R800 so the set up is prob different but my clutch has a microswitch which tells the bike when I have the lever pulled in so I can start it in gear. The CRG levers dont have the tab which operates the switch. I didn't think this would be a problem but since the install I've stalled twice at the traffic lights. Without the switch operating this means you can't just pull in the clutch and start it in gear. You have to find neutral, start it, put it back in gear and take off again. This is actually quite hard to do quickly in traffic with cars sitting behind you so I'm going to fix the switch if I can make something up. Not sure if this is the same thing on your levers. |
|
|
|
|
Logged
|
|
|
|
|
mattyvas
|
|
« Reply #12 on: May 27, 2008, 12:46:14 AM » |
|
Hey Techno, Take a look at this, I know it is from the store of the ex-owner of T.O.B. But I got one when I put my CRG's on and it works a treat. CRG mod switch for clutch |
|
|
|
|
Logged
|
|
|
|
|
techno
|
|
« Reply #13 on: May 27, 2008, 04:27:35 AM » |
|
That looks like it will do the trick...
but so will a suitably bent piece of metal.
My brother in law is a sheet metal worker so I'll prob get him to bend me something utilising one of the bolts on the lever. If I ever get it done I'll post some photos.
|
|
|
|
|
Logged
|
|
|
|
|
BretMorris
|
|
« Reply #14 on: May 27, 2008, 08:02:59 AM » |
|
Thanks guys, When i took the original lever off the purpose of the short rod was obvious,to accuate a switch. Levers all on, love the look of them and now tomorrow it is off to the Ducati workshop for the exhausts.... I will get themto check my spanner work..lol
Bret
|
|
|
|
|
Logged
|
|
|
|
|


