Ducati Monster Forum

powered by:

February 06, 2025, 07:49:31 PM *
Welcome, Guest. Please login or register.

Login with username, password and session length
News: No Registration with MSN emails
 
   Home   Help Search Login Register  


Pages: 1 2 3 [4] 5 6 ... 10   Go Down
  Print  
Author Topic: 'Belle's 748 Fix-up  (Read 30011 times)
MendoDave
Guest
« Reply #45 on: September 22, 2010, 08:03:58 AM »


I noticed that the clear coat I applied to the tank is not on there very well.  The slightest ding or tap makes it flake off. 

Ahem.... self etching primer.
Logged
mostrobelle
Hero Member
*****
Offline Offline

Posts: 2549


1994 M900, in red, of course...


« Reply #46 on: September 22, 2010, 09:01:57 AM »

^^^ what does that mean?
Logged

94,500 miles...05/22/15
Artful
I'm glad they make pills for my
Hero Member
*****
Offline Offline

Posts: 1498


« Reply #47 on: September 22, 2010, 09:19:43 AM »

^^^ what does that mean?

Just like you sand a surface to enhance adhesion, there are primers that chemically etch the surface finish to promote good adhesion. They work like a charm, but if you're looking at retaining a polished metal tank... I've never seen clear self etching primer. Then again I never looked either.
Logged

Every time I meet a new group of your friends that understand you and your weird sense of humor I'm a little more amazed that there are other people in the world like you that lived through childhood - My loving girlfriend
MendoDave
Guest
« Reply #48 on: September 22, 2010, 09:32:59 AM »

^^^ what does that mean?


^^^^ What he said.
Logged
Artful
I'm glad they make pills for my
Hero Member
*****
Offline Offline

Posts: 1498


« Reply #49 on: September 22, 2010, 09:43:23 AM »

Ha, found something that will help. Talked to a buddy of mine that paints a fair amount and he suggested HOK Adherto http://www.houseofkolor.com/products/specialty.jsp.

It's a clear adhesion promoter that works on bare metal and can be shot with a quality clear. Also, go with three or four coats of clear. More sealing is better when you're clearing bare metal.

ALSO!!! Surface prep is EVERYTHING with painting bare metal. Use a prep spray and lint free everything to make sure you get rid of any trace of fuel, oil, Dorito grease, and general filth.
« Last Edit: September 22, 2010, 09:48:37 AM by Artful » Logged

Every time I meet a new group of your friends that understand you and your weird sense of humor I'm a little more amazed that there are other people in the world like you that lived through childhood - My loving girlfriend
mostrobelle
Hero Member
*****
Offline Offline

Posts: 2549


1994 M900, in red, of course...


« Reply #50 on: September 22, 2010, 12:23:38 PM »

Thanks!
Logged

94,500 miles...05/22/15
mostrobelle
Hero Member
*****
Offline Offline

Posts: 2549


1994 M900, in red, of course...


« Reply #51 on: September 26, 2010, 08:02:55 PM »

Saturday**************I had cleared pretty much the entire weekend so that I could focus on the 748.  No rides, no farting around, no procrastinating... time is running thin, as are my hard liquor stores as a result of me thinking about the state of the bike and the upcoming trackday.

I got up bright and early, slammed some eggs and toast and set up my state of the art motorcycle finishing studio...


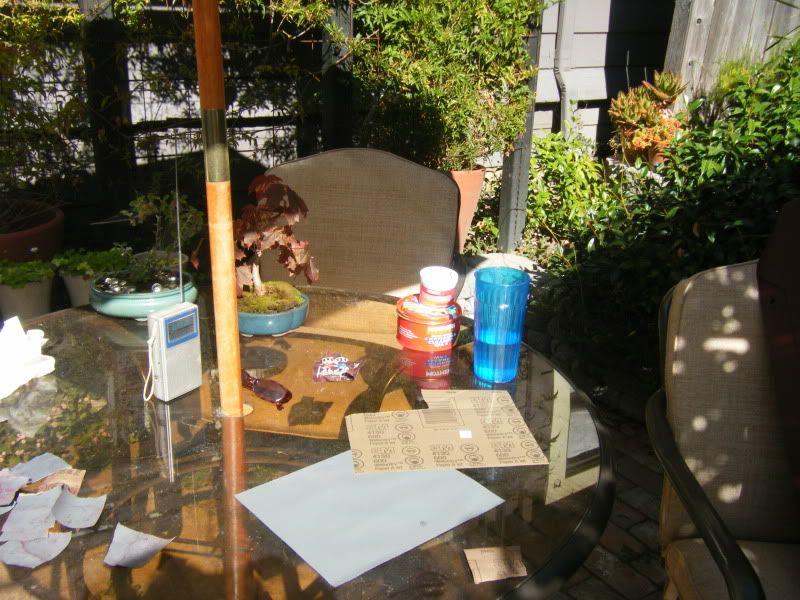
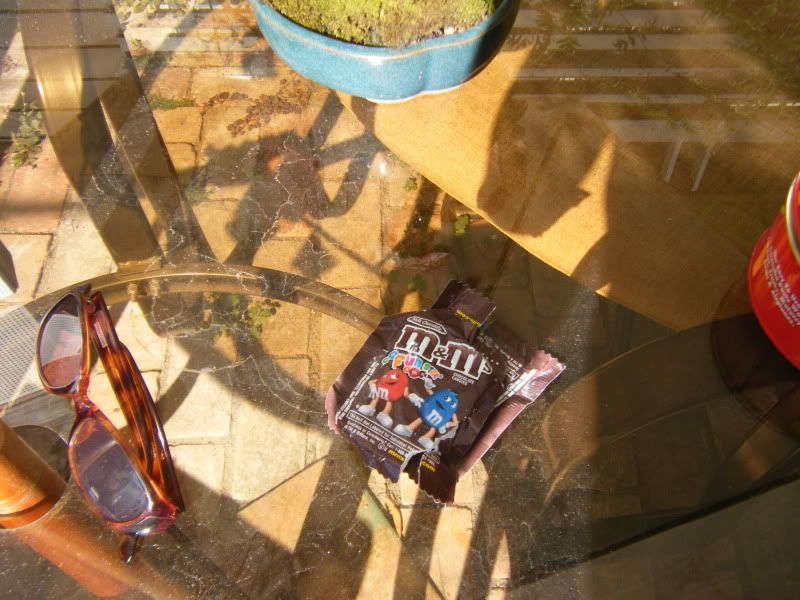
The M&M's are key to any good workday, as is the transistor radio.  Country was on today with a smattering of KALX whenever they played Shania Twain.


The plastics were nearly all primed and some of them had been sanded.  I finished up the last of the pieces needing primer and went over them with dry 400 grit paper.  I then used a prep cloth that I'd picked up from the paint shop to degrease and remove lint and dust and shot the first coats of color.  The cans didn't come with instructions and the shop didn't tell me how to apply it, so I did three coats and waited five minutes between each application.  (That was how the primer directions were, so I figured they'd work with the paint.)  I didn't sand between coats. 


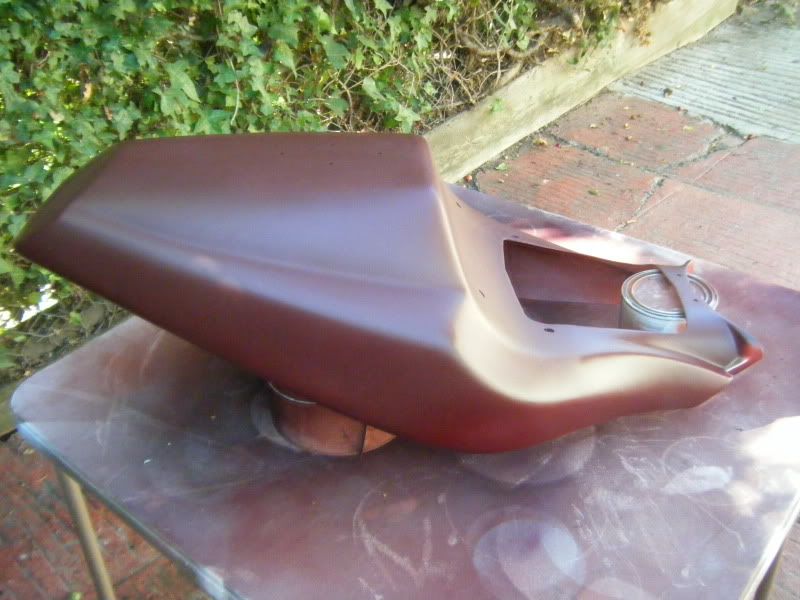
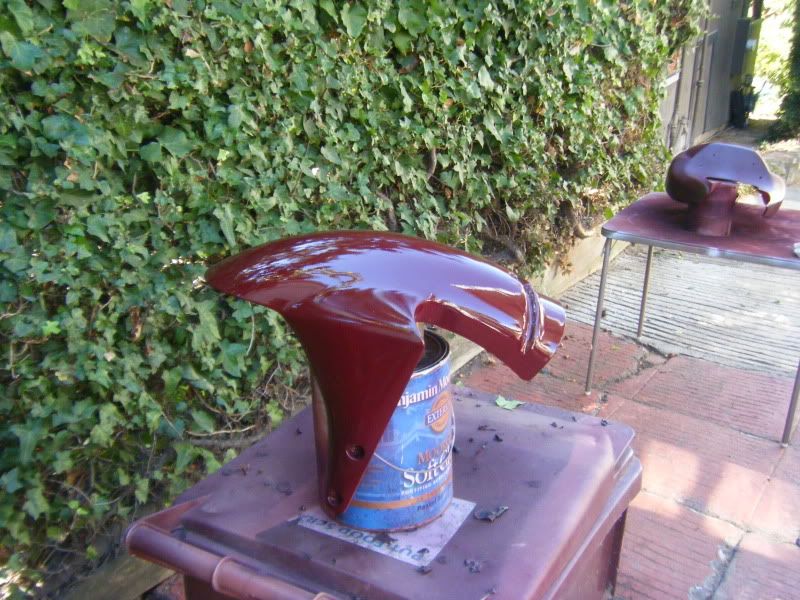
The color came out well, and I was really glad that I'd taken the time to sand down the primer coat.  The primer is absolutely essential--there were a couple of spots where I'd accidentally sanded through it and the paint didn't want to cover it very well.  My approach was to paint the edges and high points first, wait five minutes, give everything a once over, and then repeat that three times.  Can't tell you how nice these can are--really even application, good coverage--1000X better than Krylon!  Double the cost, but well worth it. 

I was thinking that the color coat would be shinier and more durable than it was.  Secretly I was hoping I might be able to cop out and be done after doing the color.  However, I discovered that this pro paint scratched easily and some of the color would rub off with a towel.  It obviously needed a clear coat, and I was really nervous about doing this.  I've never had good luck with clear coat. 

After I did the color coat, I sanded everything down with a 600 grit.  I needed to do that wet for some reason.  The paint would ball up on the paper in a second if it wasn't pretty wet.  I formed a little assembly line sanding, touching up with color, and sanding again a little.  Sanding with the finer grits was becoming faster and easier.  I was finally ready for the clear coat. 

I took the smallest piece of the bunch and experimented on it.  ZOMG...it doesn't look like sh!t!!!!   


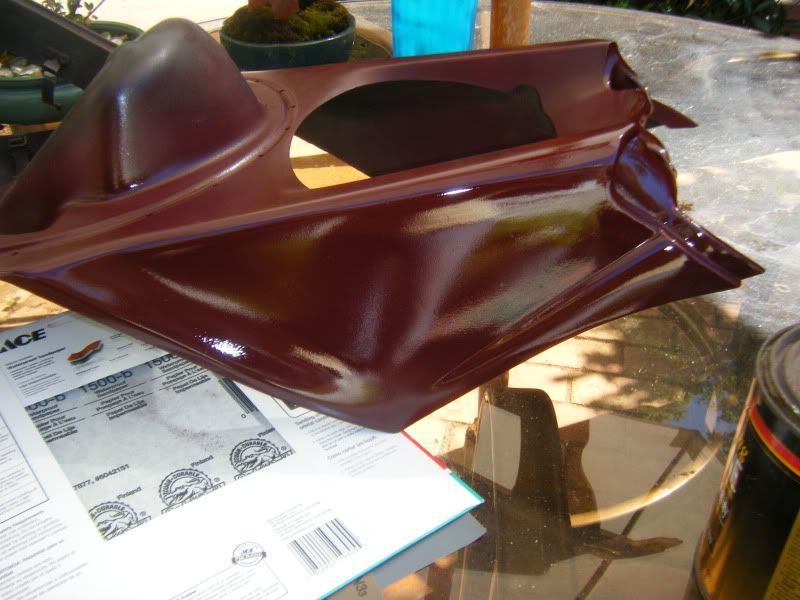
This was a first for me, and a good shot of confidence.  The professional clear coat stuff I bought went on like butter.  I might actually be able to do this.  I was still a bit disappointed that there was visible orange peel texture after all that friggen sanding, but was hoping to be able to fix that. 

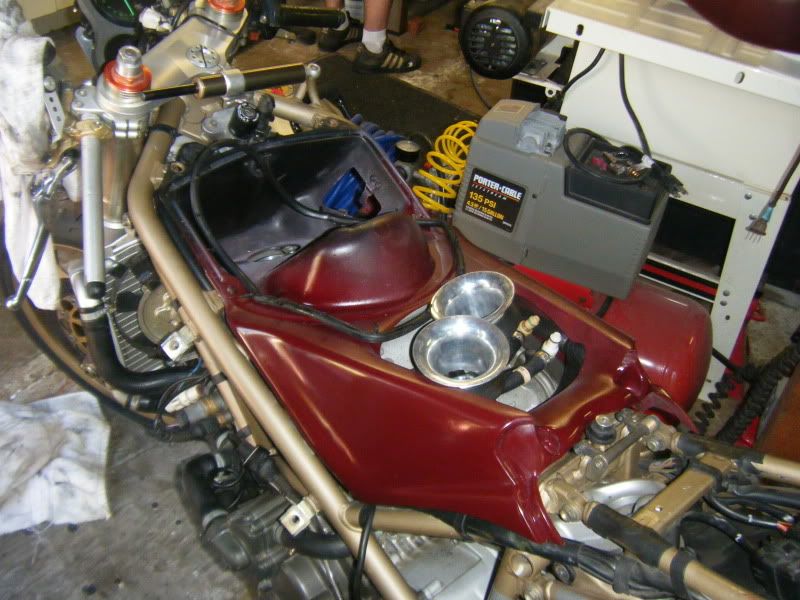
The last thing I wanted to do was to fill the tank with a bit of gas to make sure that the new seal I'd installed actually worked.  I did that and left it, crossing my fingers for the best.  And so ended Saturday. 

Sunday************

I busted open a pack of M&M's and another of 1500 grit sand paper.  I had checked the gas tank and not only had it not spontaneously combusted--it actually held gas.  Awesomeness...so now I needed to figure out how to smooth out the clear coat a bit that I'd sprayed yesterday.  I took the small piece from last night and dry sanded it.  OK, that sucked.  It looked like ass.  So I wet-sanded it.  Still assy.  And then I took polishing compound to it.  Mother of god...it got shiny and looked like, well, a finished paint job.  I put three coats of wax on it, buffed it, and viola.  I was in business.  I slapped that on the bike, and was now ready to reassemble the tank.   


In between putting back all the stuff that I'd forgotten I'd taken off the bike (Where does this fastener go?  Uh...why do I have an extra gasket?)   I clear-coated some more pieces of the body work.  Once again there were no instructions.  I did, however, remember to ask at the shop how to apply the stuff when I was buying it.  They said one light coat and another medium-heavy.  I didn't get time frames or know exactly what "medium-heavy" was supposed to be.  I waited five minutes between the first light coat--I figured this helped to seal the color coat--and the medium-heavy coat.  I applied the medium-heavy coat until I saw the paint start to "melt together".  That's when I stopped.  If I kept going it would run a little.  If I did too light a coat, it would just look all "misty". 


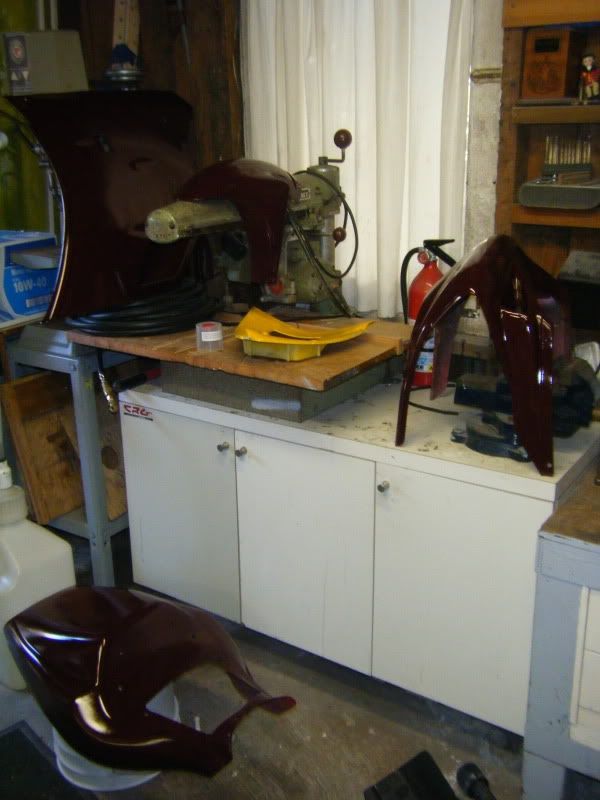
The larger pieces were a challenge, and I foresee many hours of polishing sprinkled with ample cursing in my future.  Once again...a sneak peak into the state of the art facility: Amongst the piles of crap and carefully balanced in the dingy corners are my plastics.  Everything has a clear coat and I can probably knock a lot of that out during the week.  (Please don't hold me to that.) 


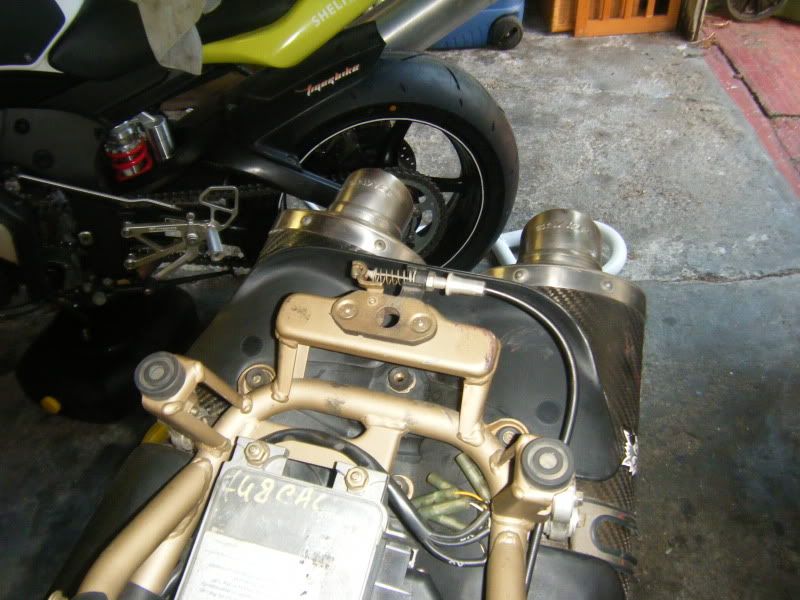
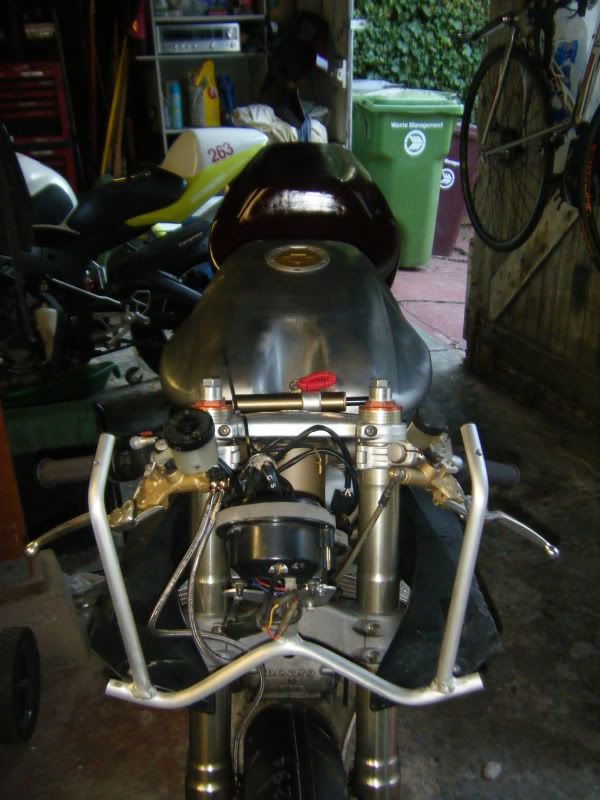
And between clear coats new brake lines got installed (courtesy Enzo76) to replace the stock one that can apparently get caught on the front fender and rip out.  OOOOooo shiny. 


And all the little pieces that I've slowly been gathering to reassemble the tail sections are finding a home on the bike.  The latch is now installed, thanks again to Enzo, who was taking a few minutes to tinker on my bike while he got his ready for track, too. 


The tank is now completely assembled and--no kidding--the bike runs.  It didn't blow up either.  (I figure it's waiting for me to take it around the block after it's all painted to blow up.)  And, yes, those are new tires.  MichaelMoore picked them up at a trackday, and since he borrowed my truck to go to the track, they got delivered right to my house with the return of the pick-up. :thumbup

So at the end of the weekend, the bike runs but the seat isn't attached quite yet--waiting for paint to dry.  I have new grips, new tires, new brake lines, all the fluids are in good shape, and I have new spark plugs.  I need to sand/polish all the bodywork and finish attaching the seat.  I've spent quite a bit of time during the weekday evenings cleaning and checking little things out.  I had a few minutes to kill waiting for coats to dry and even scraped all the old wheel weight goop off the rear tire (discovered my weights weren't taped back there, so I did that).  It looks so good that I have to do the front wheel now too.  :rolleyes


I'm a little ahead of where I planned to be--does that *ever* happen?  Next weekend I'll take the bike around the block and see how she purrs.  I'll have enough time to apply a few decals, maybe get some numbers on her, and spend an hour huffing Goo to remove the old wheel weight crud off the front wheel.  (Still waiting for something to blow up.)
Logged

94,500 miles...05/22/15
MendoDave
Guest
« Reply #52 on: September 27, 2010, 12:37:57 AM »

Looks good from here.  waytogo My paint jobs always look good from a few feet away but don't look too closely at them.
Now I see that this fixation with fire you have, it must stem from your mother.

Anyway You have given me a great sense of accomplishment, and all I had to do was look at the pictures, throw in my 2 cents, and look, all done with no paint in my lungs! That was so easy I'm going to send you my gas tank and have you pull the dent out and paint it.  Grin
Logged
tigre
Hero Member
*****
Offline Offline

Posts: 524


Ouch!


WWW
« Reply #53 on: September 27, 2010, 01:12:24 PM »

Bike is looking good.

Take the brake calipers off and reattach after routing the line around the OUTSIDE of the forkleg.  That is how you make it mechanically impossible to get caught with the wheel.
Logged

'12 1199RS Tigre 6
'12 1198RS Tigre 7
'00 M944S Tigre 1
AFM #5 - Open Twins and more
desmoquattro
Smacking certain mods who change my profile upside the head with a...
Hero Member
*****
Offline Offline

Posts: 4088


It puts the billet aluminum on the motorcycle...


« Reply #54 on: September 27, 2010, 01:25:26 PM »

Bike is looking good.

Take the brake calipers off and reattach after routing the line around the OUTSIDE of the forkleg.  That is how you make it mechanically impossible to get caught with the wheel.

...ask him how he knows.
Logged

My Vices
'09 1198s,red, (Il Diavolo Rosso
'09 KTM 690 SMC (Thumpy)
'04 Yamaha FZ1, The Blue Cockroach
'01 900SS, custom yellow, (The Bumblebee)
'05 MS4R, blue
Spidey
Crashin' mofo
Hero Member
*****
Offline Offline

Posts: 4842


« Reply #55 on: September 27, 2010, 01:32:30 PM »

I dunno where you got those brake lines from (and their length looks fine), but do a quick test to be sure. Completely unload the suspension and make sure there is still slack in the lines.  The last thing you want is to come over a crest and have your brake lines pop off. 
Logged

Occasionally AFM #702  My stuff:  The M1000SS, a mashed r6, Vino 125, the Blonde, some rugrats, yuppie cage, child molester van, bourbon.
Speeddog
West Valley Flatlander
Flounder-Administrator
Post Whore
*****
Offline Offline

Posts: 14813


RIP Nicky


« Reply #56 on: September 27, 2010, 01:38:21 PM »

I dunno where you got those brake lines from (and their length looks fine), but do a quick test to be sure. Completely unload the suspension and make sure there is still slack in the lines.  The last thing you want is to come over a crest and have your brake lines pop off. 

Preferably, after re-routing as Tigre suggested.
Logged

- - - - - Valley Desmo Service - - - - -
Reseda, CA

(951) 640-8908


~~~ "We've rearranged the deck chairs, refilled the champagne glasses, and the band sounds great. This is fine." - Alberto Puig ~~~
enzo
Sr. Member
****
Offline Offline

Posts: 393


Street: 94 M900 Track: 05 R6


« Reply #57 on: September 27, 2010, 01:54:33 PM »

Roger that. 
Logged

we're creepin' between the bullfrogs
mostrobelle
Hero Member
*****
Offline Offline

Posts: 2549


1994 M900, in red, of course...


« Reply #58 on: September 27, 2010, 05:45:10 PM »

I dunno where you got those brake lines from (and their length looks fine), but do a quick test to be sure. Completely unload the suspension and make sure there is still slack in the lines.  The last thing you want is to come over a crest and have your brake lines pop off. 

Got them from Desmoto.  They had to be ordered to custom length.  I didn't understand why, but it makes more sense now.
Logged

94,500 miles...05/22/15
mostrobelle
Hero Member
*****
Offline Offline

Posts: 2549


1994 M900, in red, of course...


« Reply #59 on: October 02, 2010, 07:15:13 PM »

Painting is finished.  And it turned out...pretty awesome...if I do say so myself. :p  For not having a friggen clue what I'm doing, I'm shocked at the results.  I'm letting the remainder of the bodywork cure right now.  Pictures of a fully assembled bike coming soon.  <drumroll...>

Tomorrow I'm taking it out for a test spin after I put on the tank grip.  The seat was installed (finally!) and the brake lines re-routed.  Everything is 100% go.  I'll snap a photo tomorrow on "the ride" which will constitute a 10 minute jaunt around the 'hood just so I can make sure nothing is totally fux0red before I hit the track in 9 days.
Logged

94,500 miles...05/22/15
Pages: 1 2 3 [4] 5 6 ... 10   Go Up
  Print  
 
Jump to:  


Powered by MySQL Powered by PHP Powered by SMF 1.1.21 | SMF © 2015, Simple Machines
Simple Audio Video Embedder
Valid XHTML 1.0! Valid CSS!
SimplePortal 2.1.1